


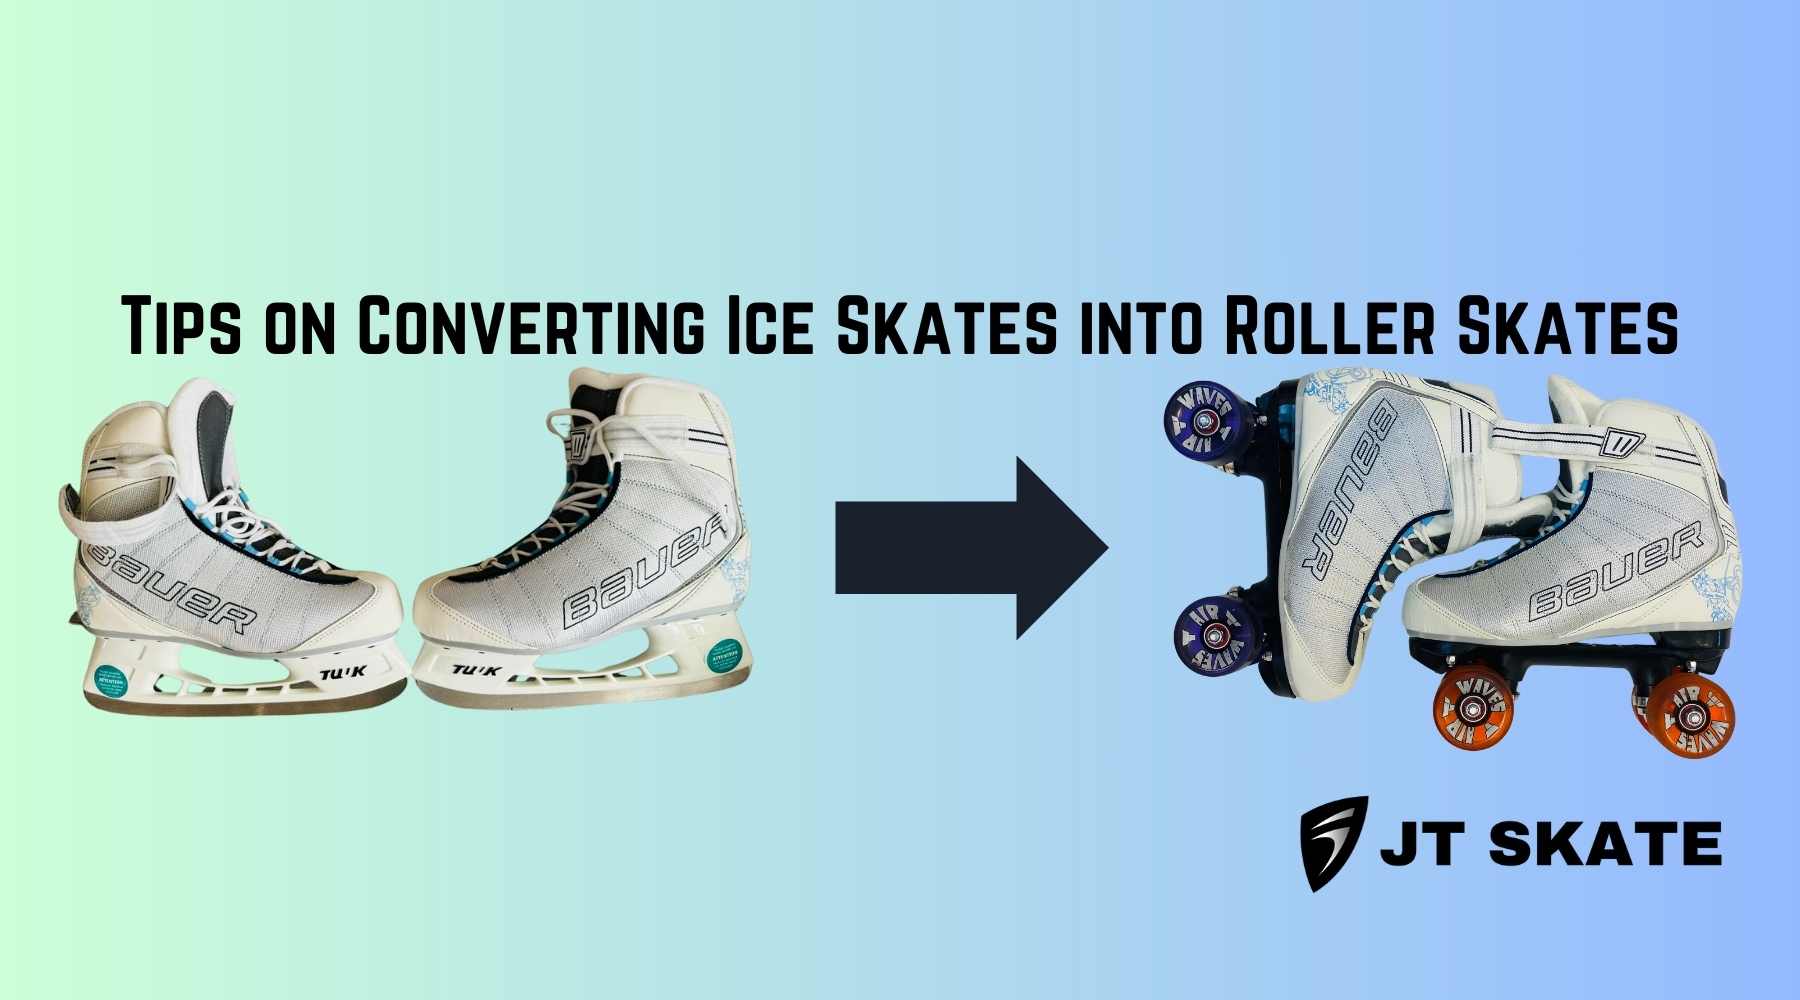
Bauer and CCM are two of the most popular brands of quad roller skates among avid and beginner skaters alike. Except Bauer and CCM do not actually manufacture quad roller skates. If you’ve ever seen a pair of Bauer or CCM quads, chances are those were actually converted from ice hockey skates. If you happen to own a pair of Bauer or CCM ice hockey skates, this article will show you how to easily convert them into a pair of quad roller skates.
Tools and Parts Needed:
- Hammer
- Drill with 5mm screw and 8mm screw tightener
- Pair of plates
- Fixing kit with heels
- Rivet Machine (optional)

Step 1: Removing the Blades With a Hammer
To begin your conversion, you must first remove the ice hockey blade from each pair of skates. First, undo your laces to allow your hand access to the inside of the skates. Next, take out the sole at the bottom of each skate. This will expose the screws at the bottom of the boot and make removing them easier. Plus, you don’t want to ruin your skates by accidentally poking a hole in your soles. Once those are removed, you are now ready to remove the blade. Using a blunt tool like a hammer hit the top of each rivet until they pop. Repeat this process for each rivet until the blade comes right off.
With a Riveting Machine
Chances are you don’t own a riveting machine. But if you do, here’s how to use one to remove the blade from your skates. Place the boot facing downward and align each screw with the pointed bit of the machine. You should feel a click when the boot is properly aligned with the machine. Once you have properly aligned the screw, use the crank at the side of the machine to push out the screw. If you’re not sure if the screw is properly aligned, slowly turn the crank and check if the top portion perfectly aligns with the other end of the screw. When you’re certain that the alignment is correct, turn the crank until the screw is pushed out. The screw should come out with only minimal force, so if you’re putting a lot of pressure on the crank, chances are you haven’t properly aligned the screw. Repeat this step until all the screws are pushed out, and the blade should come right off.
Tip: If some rivets don’t come cleanly off, use the back end of a hammer and pry the exposed tip of the rivet until they come off. If there’re only a few stubborn rivets and you can already pull back part of the blade, use the back end of a hammer to pry the entire blade off in one go.
Step 2: Installing the Plates
The next (and arguably most important) step is to install the plates. The plates are the part of the bottom of roller skates which the wheels attach to, so it is important that this step is taken with extra care. The size of plates are determined by the size of your skates, so check the size before you get plates. You can refer to this chart to see what size plates you will need:


Sizing chart for Play Maker (top) and Rock plates (bottom)
Drilling Holes: You will need to drill holes at the bottom of each boot in order to install the plates. To do so, you will need to align the plates with each boot. Start by aligning the plate along with a heel to see where the holes of the plate line up with the boot. Make sure the plates are facing the correct way with your boots, with the front being the part of the plate where you would install the toe stopper or jam plugs. To make drilling the holes easier, we recommend first unscrewing the section of the plate where the wheels go (known as the ‘truck’), and turning them to the side to better expose the holes on the plate. Once that is done, align the plates with a heel at the back to see where you need to drill holes. The best guidance for aligning plates correctly is making sure the plates are straight and that the front is perfectly aligned with the front of the boot. It is okay if the back of the plate is slightly beyond the back of the boot, but never have the front of the plate go beyond the front of the boot. Once you have aligned the plates properly, get a bit of tape and tape the plate to the boot to keep it steady. Next, get a drill and slightly mark each hole. Do not drill a hole just yet as this is just to make sure the plates are properly aligned. Do this for each pair of skates. Once you have marked where you want to drill, compare each boot and make sure they are even. After you checked and are happy with the alignment, you can now drill your holes. We recommend using a5mm screw to drill the holes which will give you the right size holes to attach the plate through.
Installing the Plates: After you’ve drilled holes in each boot, it is time to insert thefixing kit. The fixing kit is the metallic pieces with screws that allow the plate to attach to the boot. You will need a front and a back piece for each boot, so you will need four total. The front fixing piece is the same regardless of brand. However, back fixing pieces come in two variations, a longer and shorter one, so check which ones you need depending on the thickness of your boots. Most modern Bauers and CCMs use the smaller variation while older versions (such as Nike Bauer) use the longer one. Once you have the correct fixing kit, you can insert them through the inside of each boot so that the screws point out through the bottom of the boot. Once those are inserted, you can fit the plate on the screws. Make sure to insert the heel at the back of the boot first, then insert the plates. Insert the washers (the small metallic ring) and nuts at the tip of each screw. Once those are in place, you can use a drill with an8mm screw tightener to tighten each nut to properly secure the plates. Rotate the trucks back to their original position and tighten them in place. Reinsert the soles and lace up your boots, and you’re ready to add on your wheels and bearings.
Tip: Instead of buying the plates and parts for the fixing kit separately, you can buy them as a set directly from JT Skate.
Step 3: Picking Out Wheels and Bearings
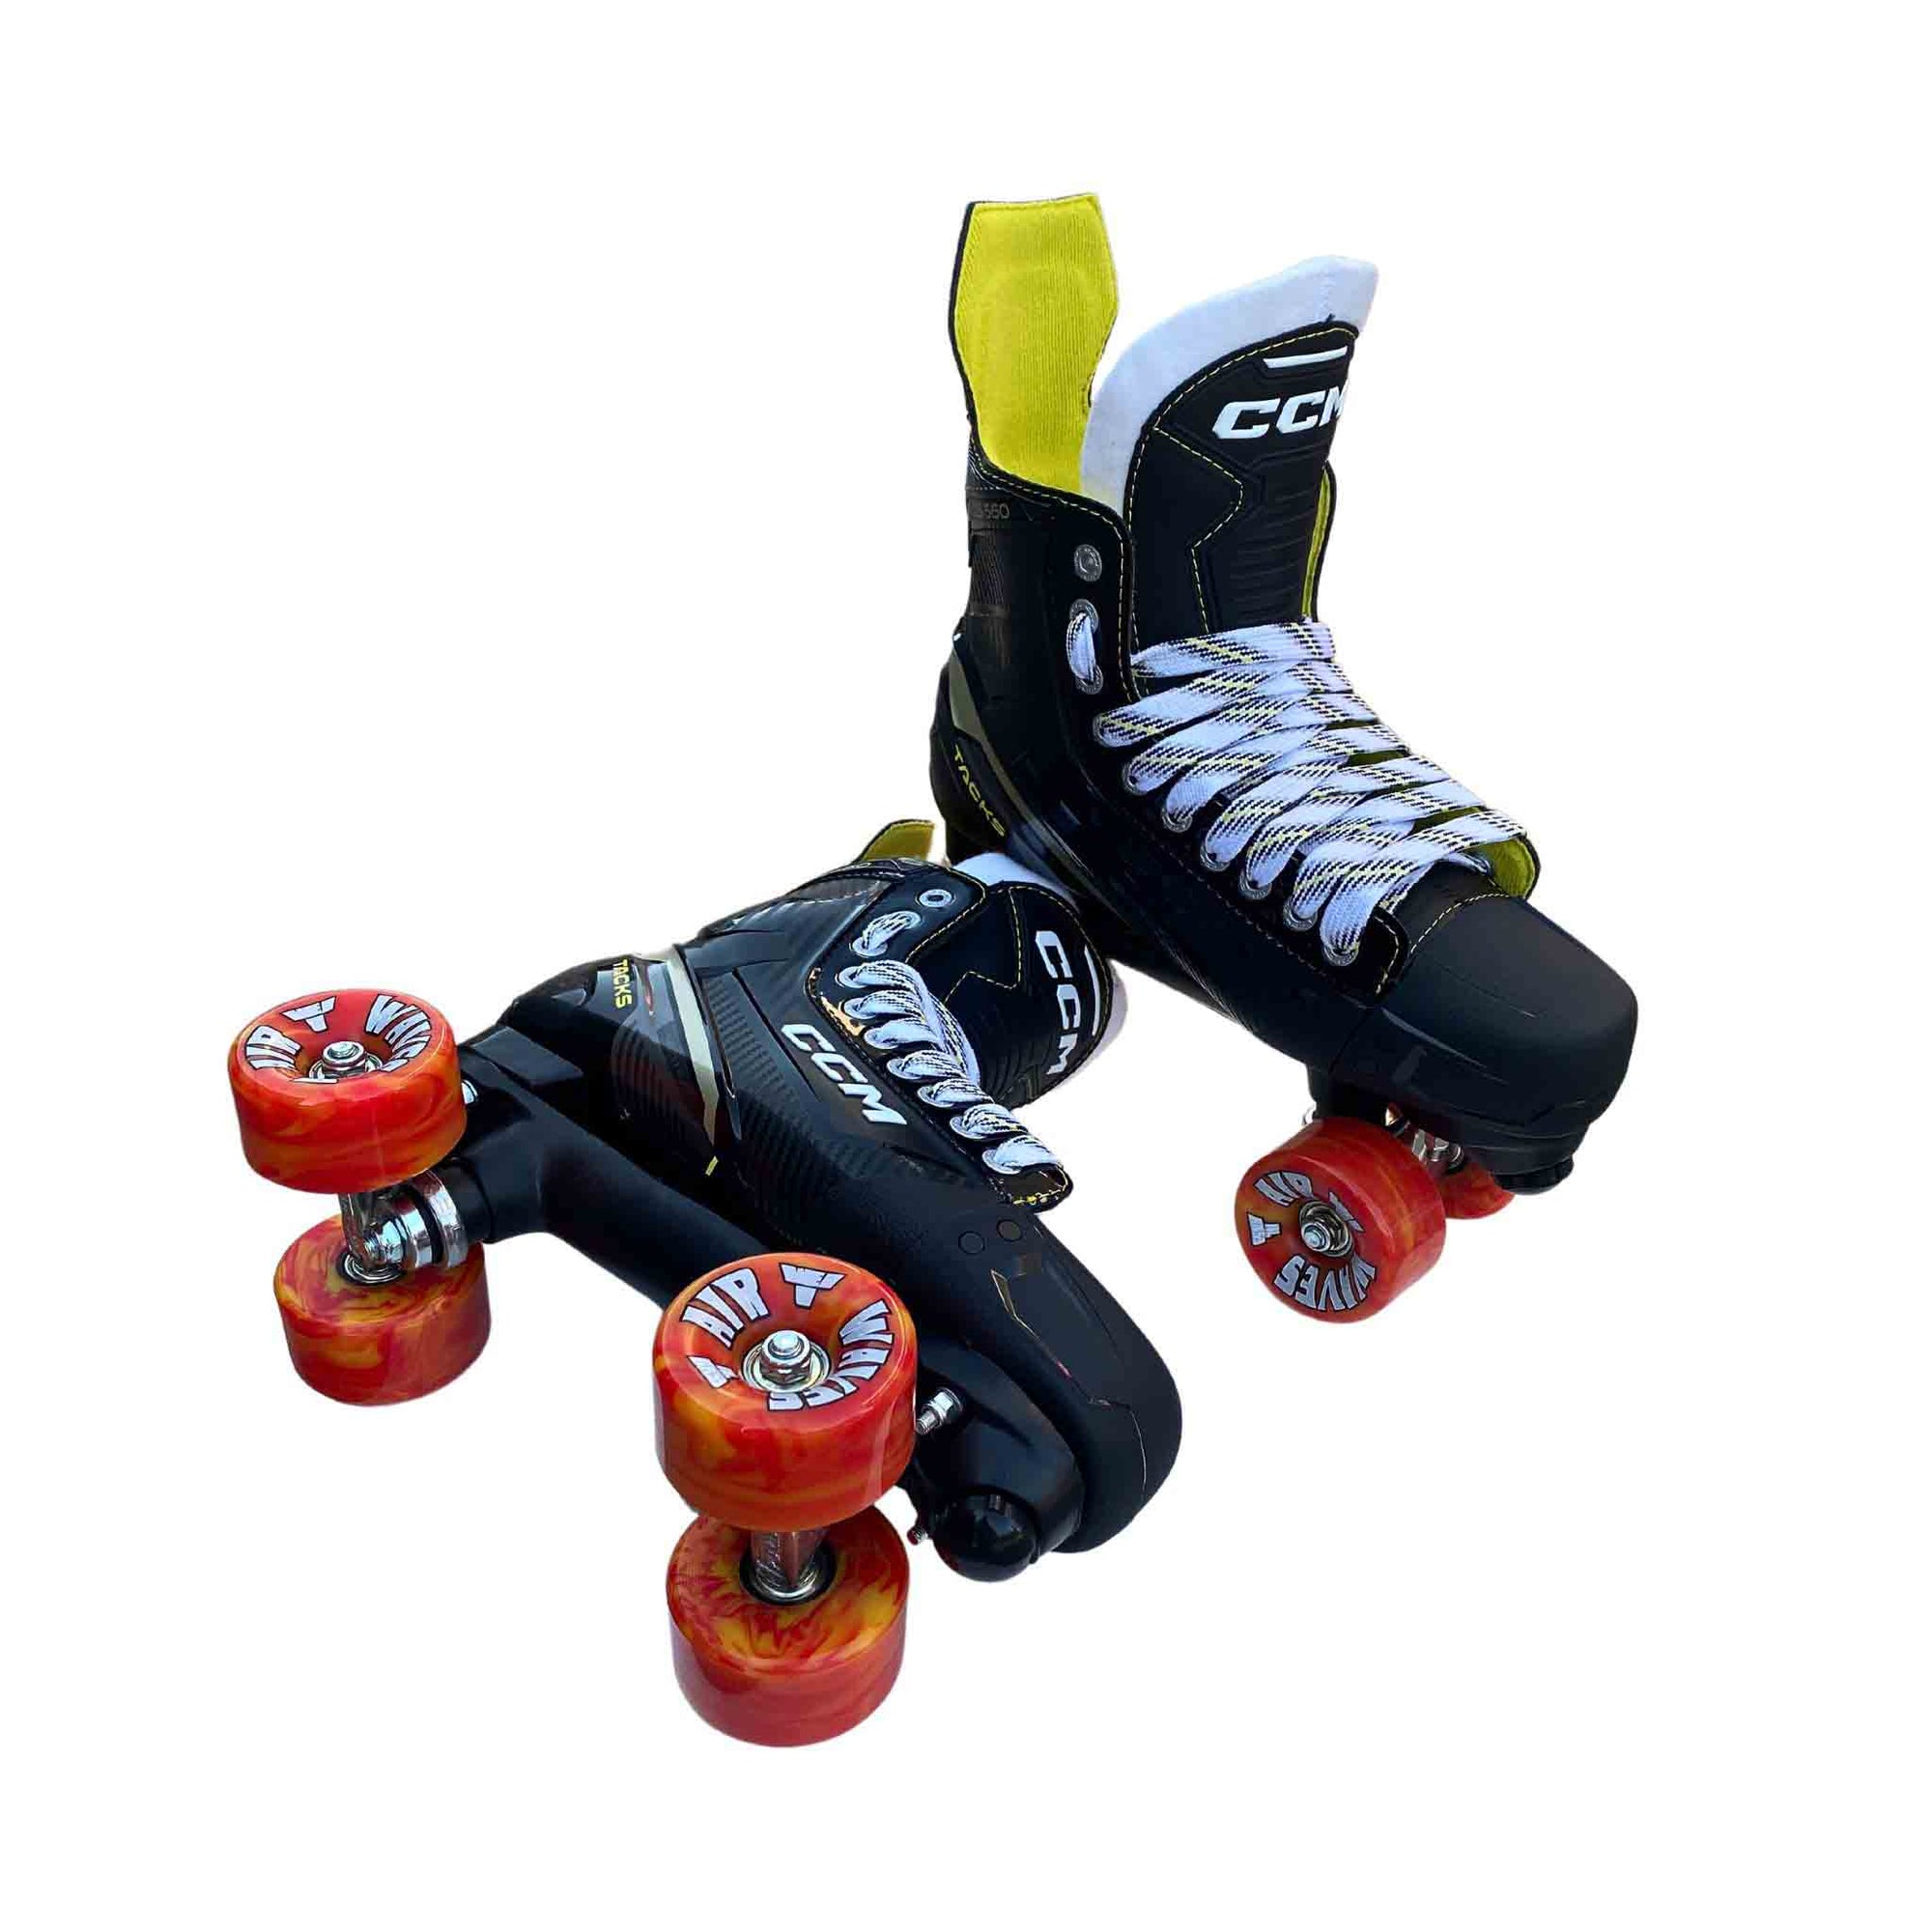
Now that you have successfully converted your pair of ice hockey skates into quad roller skates, it is time to pick out a new set of wheels and bearings. Depending on the type of skating you intend on doing, picking out the right type of accessories is a crucial step for giving you the right type of skating experience. If you intend on skating outdoors, especially in parks or on pavement, then we recommend getting a pair of Air Waves to give you the smoothest possible skating experience. If you prefer to skate indoors or love going to disco nights at your local roller rink, then a harder set of wheels like the Ventro Pro Turbo are a good option. You can also pick out your bearings to give you a better overall skating experience. Check out this article from the JT Skate blog on how to change your bearings and learn more on which are right for you.
Regardless of the accessories you end up choosing, being able to convert a pair of ice hockey skates into quad roller skates properly is critical to making sure you have a high quality pair of skates. If you’re still unsure how to do the conversion on your own, contact us at JT Skate to make an appointment for conversions and have your new skates ready the same day. Happy skating!