


Bearings are an important part of ensuring a smooth and enjoyable skating experience. Whether you’re cruising down the street on a cruiser skateboard or doing tricks with a pair ofBauer XLP Roller Skate, a good set of bearings are essential if you’re doing any type of skating. Thus, it is important to know how to change your bearings. From replacing your bearings fully to just routine maintenance, changing out bearings is a quick and easy process which this article will guide you through.
First, what are bearings?
Bearings are the metal ring that goes in between the wheels of skates. All skates use bearings, including skateboards, quads, and inlines. Bearings are what allow the wheel to attach to the axel (the metallic rod that sticks out on the side of trucks and plates). Without bearings, there is no way for the wheel to spin. Making sure that you have the right type and number of bearings is essential for giving you the best possible skating experience.

A set of ABEC 11 bearings fromJT Skate.
Which bearings should I get?
Bearings are measured by the ABEC scale, an industry-wide standard for measuring the tolerance of bearings. The scale ranges from 1, 3, 5, 7, 9, and 11, with 1 being on the bottom of the scale and 11 being on the top. The higher the bearing is on the ABEC scale, the smoother and faster your wheels will spin. Understanding what type of skating you do is essential for picking out the right type of bearings. ABEC 5 bearings are a good starter bearing for most skaters, especially with Air Waves wheels.Fracture!! ABEC 9 are known for their blue and black colour and are good if you’re looking for a better skating experience. If you want the best quality bearings, we recommend you go for our selection ofBones Reds, Super Reds, and Ceramic bearings.


There are multiple brands that manufacture and sell bearings, fromFracture!! (top) to the higher-qualityBones Reds (bottom).
How many bearings do I need?
The type of skate you use determines how many total bearings you need. The math is simple; each wheel needs two bearings, so the total number of bearings is double the amount of wheels you have. You need eight bearings for skateboards, 16 bearings for a pair of quads, and six to eight for inlines depending if you skate with three or four wheels. All bearings come in either sets of 8 or 16, so count how many you need depending on your skates.
How do I change bearings?
No matter which bearings you end up choosing, knowing how to install and change them is a key part of owning any pair of skates. This article will guide you on how to take out and install bearings so you can easily change them at home and keep your wheels spinning quickly and smoothly.
Step 1: Taking out the bearings
If you already own a skateboard or pair of quad or inline skates with wheels, chances are they came with a set of bearings. Whether you want to clean between your wheels or want to replace them entirely with a new set, it is important to know how to take out your bearings. The process is the same for both skateboards and roller skates, so follow this guide closely. You’re going to be taking things apart, so find yourself a flat surface like a table to make sure you don’t accidentally lose anything in the process.
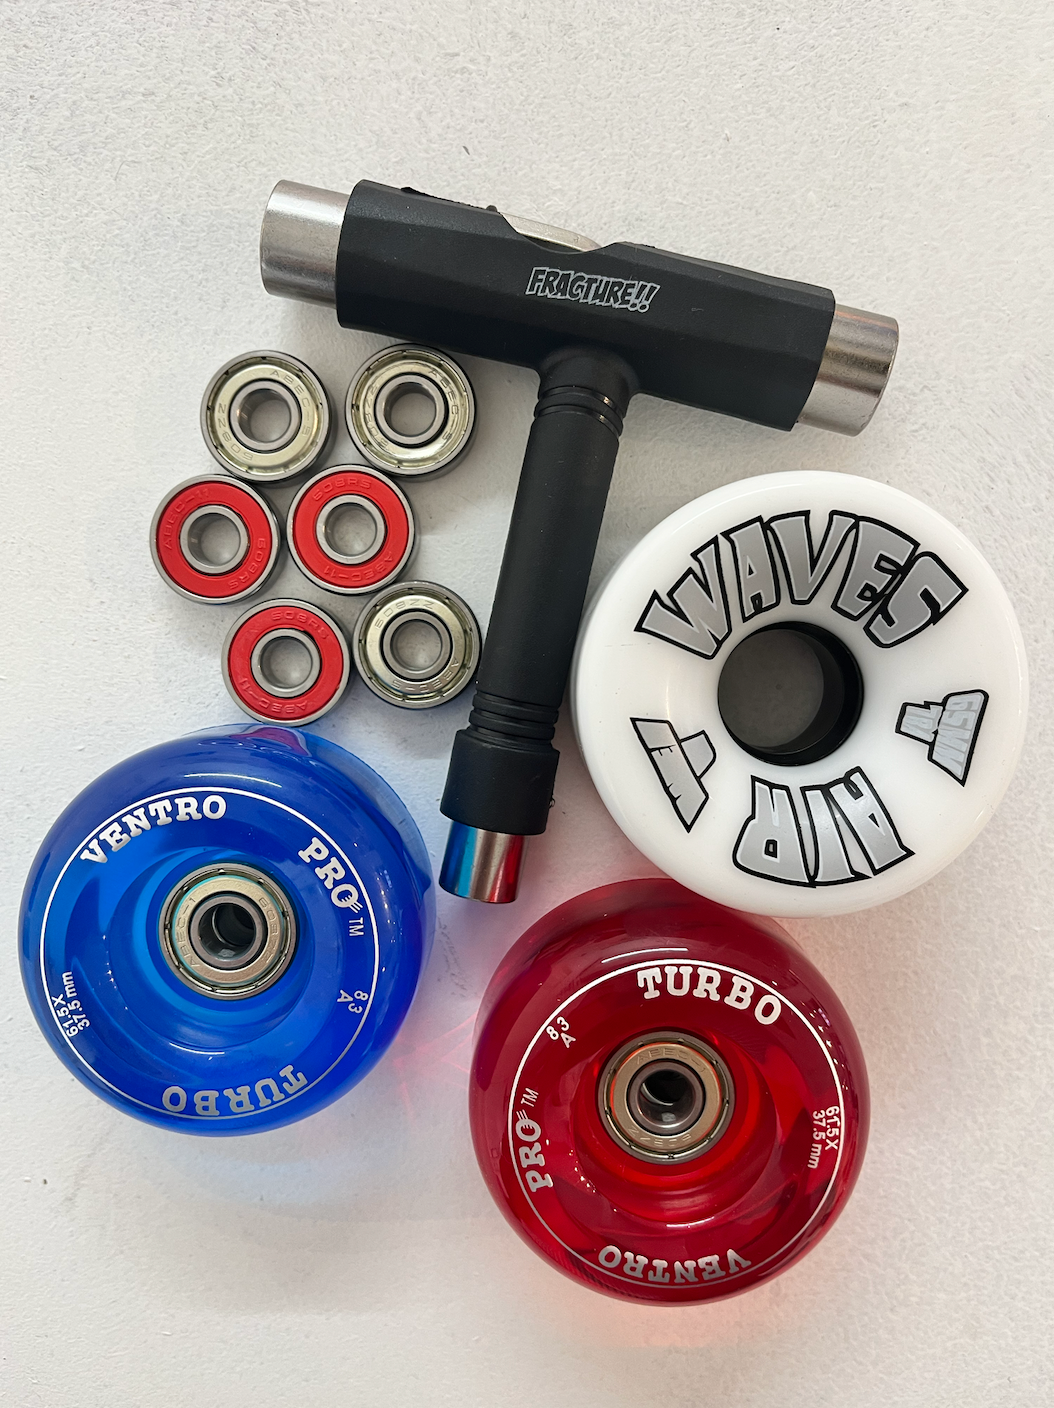
First, unscrew the nut at the tip of each axel. The nut is the small metallic piece that is at the centre of your wheels. We recommend using aT-Tool for this part to easily loosen and tighten each nut. A power drill with the correct size tip also works but is not necessary. Using the T-Tool or power drill unscrew each nut and place them to the side. Once you’ve done this for each wheel, you can take the wheels off your skates.

AT-Tool is a essential fixing tool for maintaining your pair of skates, and every skater should keep one on them to fix any issues while on the go.
Second, take out each bearing from the wheels. The easiest way to do this is to place your skate on the side so that the axel is facing upward. Insert the wheel just slightly on the tip of the axel, just enough to get a grip. Pull back on the wheel and the bearing should come right off. Some people prefer to do this step with a pointed object like a screwdriver. You don’t need to insert it all the way, just enough for the object to get a hold of the bearing so you can yank it out.
When you remove the first bearing, you should find a small cylinder-like object called aspacer. Spacers do just what the name implies as they provide space between the bearings and allow the wheels to spin properly. Place the spacers to the side as you take out each bearing.
Once you take out each wheel, you should find a small metallic ring at the base of the axel. This is known as a washer and is important for reducing friction between the wheel and the base your the trucks or plates. Slide them off the axel and place them aside as they can easily fall off. Since each wheel has two bearings, you would need to do this on each side of the wheel. Now that you have all your wheels and bearings off, you can replace them.
Step 2: Installing new bearings
Installing new bearings is quick and easy. The best way to insert new bearings into your wheels is to again turn your skates on its side. There is a specific order that you need to stack each part on the axel so they properly go on the wheel, so follow closely. First, insert a washer at the base of the axel. Next, insert one bearing, followed by a spacer, and then another bearing. Think of this step like putting together a sandwich, where the bearings are the bread and the spacer is the topping. Once that is done, you are ready to insert them into your wheels. Take one wheel and push it face down against the logo. For example, if you haveAir Waves Wheels, push it face down against the axel with the Air Waves logo facing downward. You should feel a click as the bearing goes in. Remove the wheel, flip it over, and repeat this step for the other side. Each bearing should be properly secure in the wheel now. If needed, you can push each bearing down with your thumb if they're sticking out. Don’t worry if they’re not fully pushed in all the way in as they will get pushed further down once you tighten the nut. Do this for each wheel until your bearings are fully secure in all of them. The last step is to screw on the nut at the end of each axel and tighten them. We recommend tightening them all the way to make that the bearings are firmly in place within the wheel. Once this is done, you can loosen each nut so as to allow for a smooth spin on each wheel. Congrats, you have changed out your bearings and can enjoy a smooth skating experience!
Tips
- Always have a T-Tool on you, even when you’re out skating, as you never know when you might need to make adjustments.
- Clean your wheels and bearings often, as dirt and debris may cause more friction and hinder your skating experience.
- Keep a spare set of bearings in case you need to replace them on the go.
- When tightening the nut on each axel , tighten it all the way first then loosen. This will make sure that each bearing is secured. How loose you make each wheel is up to your preference, although we recommend not making them too loose so they don’t fall off while skating.
- Always make sure your trucks and plates are properly tightened using a T Tool.
- When making adjustments to your skates, always work on a flat surface. This will make the process easier and ensure you don’t lose anything along the way.